Moons of Madness has released for the Playstation 4 and Xbox One, and thanks to the awesome help from Neoseeker, we’ve been able to grab a full walkthrough guide from them, but modified a bit to fit the PS4 and XB1 release of the game. Check out the original guide over at Neoseeker, as the credit goes to them entirely. The only differences in this guide and that one is that this is modified for the PS4 and XB1, with images that may not be readily available on the original guide.
Moons of Madness is a first-person horror adventure game set on the planet Mars. As Shane Newehart, you must explore the Orochi Mars Base in effort to better understand the nightmare experienced in the short prologue – and to ultimately put a stop to the unleashed Filth. Fans of Lovecraftian horror stories will certainly feel at home as Newehart confronts his worst fears.
As an adventure game, players can expect a fair amount of puzzle-solving, a heavy dose of story, and even an occasional combat sequence. Though not an action game by any stretch, Moons of Madness has more interactivity than may be expected — there’s even a brief stealth sequence and what can reasonably be considered a boss battle.
This guide takes a minimalist approach so as to not spoil the story-rich experience. Navigational cues are provided as necessary, but our focus is on helping you solve the puzzles and escape the tricky bits without frustration. This guide is organized by chapter and subchapter to coincide with the in-game sequences.
Chapter 1
Wakeup Call
It begins with a dream, a preview of the horror to come. Shane Newehart is alone, as he’ll be for the bulk of the ensuing struggle, but he needn’t wander in the dark.
Climb out of the bed and open the airlock to exit his living quarters. Acquire the Flashlight and turn it on – all the better to see the disarray. Proceed through the green-lit door and down the stairs into the dark, where things begin to get a bit creepy.
The door down the hall on the left is broken. Continue down the hall to the locker and retrieve the Crowbar. Return to the broken door and pry it open.
A voice beckons you forward, to blow out the birthday candles. But Shane never gets that chance. Not in the dream.
ACHIEVEMENT: RUDE AWAKENING – Wake up from the nightmare.
An earthquake rattles Shane from his sleep. He’s awake in his room again, but this time it’s no nightmare. The first thing to do is to check email, but he’ll need an ID card for that. Open the cabinet door opposite the computer and pick up the photo that falls. Note the code on the back of the photo frame: 0509. Add Shane’s ID Card (Level 1 access) to inventory and login to the computer. Read through the Log Entries then select the “Unlock Door” option.
Happy Birthday to Me: Curious about that password Shane uses? One look at the window in his quarters is all you need to see May 9th was his birthday. Apparently, even smarty-pants space engineers are dumb enough to use their password as a PIN code.
Morning Routine
Exit the cabin and have a look around the habitat area. Take a moment to play with the toy Cyrano rocket (complete with Shane’s sound effects) then proceed to the Rec Room.
Follow Declan’s advice and get a cup of coffee. Grab the Coffee Mug, insert it, then start the machine. Feel free to drink a few extra cups if it suits you. Shane could use it. Grab the Flashlight from the counter then head to the Research Lab. Follow the labels on the floor to reach it. As with the dream Shane had, he’ll need the Crowbar to pry open the door. You can find it on the floor to the left of the steps leading to the malfunctioning door.
The power’s out in the Research Lab, so turn on the Flashlight and have a look around. Loop the room in either direction to find it on a workstation against the outer wall. Flip the BioGage over and inspect the reset button, then add it to your inventory. Follow Declan’s advice and grab the Pen from the table and use it to reset the BioGage. Flip it over and power it on.
Objective: Restart the Security System
Approach the server room in the center of the Research Lab where you found the BioGage and scan the room. Use the BioGage to connect to the server rack, then reboot the system. Doing so turns the power on for the Research Lab. Turn off your Flashlight.
Objective: Go to the Solar Panel Site
The power level is sub-optimal thanks to the earthquake. As engineer, Shane’s got to head to the solar array and manually realign them. Follow the arrows on the floor heading to the Airlock.
Equip the Helmet and note the Oxygen Level at 20%. This is no good! Refill the air supply using the tank and hose to the left of the helmet rack. Press the button beneath the screen by the door to change the atmosphere. Only when the Airlock matches the outdoor atmosphere can you open the door.
Piloting the MYRCAT is as simple as climbing aboard and starting the engine. Locate the button on the lower rear corner to open the bay door, then climb in. The MYRCAT isn’t pressure controlled so top off your oxygen supply and keep the helmet on. Slip into the driver seat and start the engine to drive to the solar panel array.
Power of the Sun
Objective: Restore Power to the Base
Top off your air supply and exit the MYRCAT Rover. Follow the lights to the right then up the mountain pathway. Though it’s possible to climb up and over the top of the mountain, it’s unnecessary. Continue following the lights toward the solar array on the other side of the ridge.
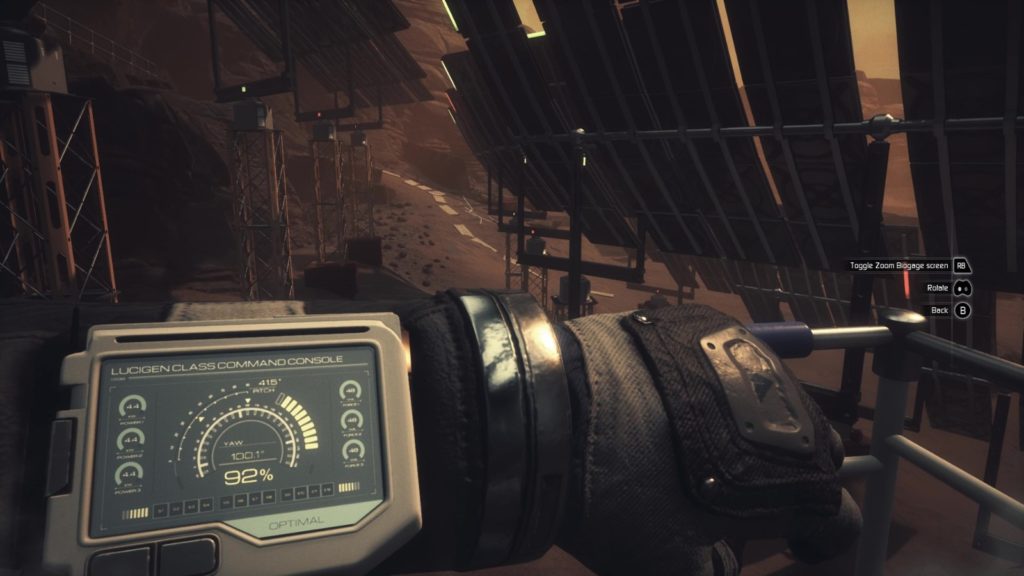
Descend the slope toward the solar arrays below. Shane will need to connect to the command console for each array and adjust the pitch & yaw of each to get at least 90% solar power. This can be done in person using the command console’s manual controls or using the BioGage. Be sure to monitor your oxygen level and replenish using the tank in the middle of the array. It’s possible to align the first two arrays by turning the Yaw to the left until optimal alignment is achieved.
- Array #1: Nearest the Slope, with Damaged Scaffolding: Pitch 38 degrees, Yaw 109 degrees.
- Array #2: In the Center, Atop Scaffolding: Pitch 40 degrees, Yaw 105 degrees.
The third array is missing its power cell. To find it, descend the elevator nearest the oxygen refill station. Extract the Power Cell from the elevator’s power supply at the bottom and enter the research outpost. Pressurize the Airlock within the facility before removing your helmet (optional). Install the Power Cell into the terminal on the left to power-up the facility.
Login to the computer in the corner, read the Log Entries to discover the missing Power Cell was placed in storage. Unlock the nearby door and retrieve the Power Cell. Take both Power Cells to the elevator, ride it up, and use the second cell to power the third solar array.
- Array #3: With Missing Power Cell: Pitch 40 degrees, Yaw 105 degrees.
With the three arrays in the optimal alignment, ascend the hill near the collapsed scaffolding. Inspect the white tower on the left. This is the power conduit. Open the hatch on the side, throw the lever to fix the blown fuse, then inspect the screen.
ACHIEVEMENT: GOING GREEN – Bring solar array back online.
Objective: Return to Base
It’s time for a quick trip down the mountain. Walk away from the Power Conduit toward the ledge overlooking the MYRCAT Rover and drop from ledge to ledge to reach the broken elevator. Descend via the trail on the left, loop around to the MYRCAT Rover, and pilot it back to base.
Don’t forget to top off your oxygen supply upon entering the vehicle.
The Flooded Greenhouse
Objective: Investigate Issues in the Greenhouse
Once at the base, pressurize the airlock, remove your helmet and head inside. Turn left to reach the Greenhouse, which is in a sorry state. The water reclaimer is on the fritz and it’s up to Shane to fix it.
Objective: Remove the Excess Water
Head up the stairs to the left, then climb the ladder. Drop through the skylight onto the pipes to enter the utility corridor. Take the Crank from the table, and loop around to the center of the room, between the steam pipes, to access a valve. Use the Crank to close the steam venting nearby and proceed through the yellow hatch in the floor. Descend the steps to another yellow hatch and continue.
Use the Crank to cut off the steam and continue through the flooded utility corridor.
It’s extremely rare to encounter a branching network of paths – the game is quite linear as far as adventure games go – so don’t worry about getting lost. Continue through the corridor until reaching the room with the pipe with the “caution” sticker. Crouch beneath it and keep to the right to avoid the steam. Proceed along the path not blocked by steam and turn the crank beside Water Filter 1.
Climb out of the water beyond the area with the contaminated mangrove roots. Push through the yellow hatch in the ceiling to reach the water reclaimer.
Take Lukas’s ID Card (Level 2) from the computer desk near the colored pipes. Each of the three water reclaimer pieces have gone missing, requiring Shane to follow the red, yellow, and blue pipes to find them. But before Shane can reclaim the water, he needs to turn off the sprinklers.
Exit the water reclaimer room using the increased security clearance and note the pipes heading to three numbered areas. Let’s get the blue one first.
Ascend the stairs to the right and enter the building marked “2” using the ID Card. Ascend the next set of stairs to obtain the Blue Recovery Unit.
Unlock the door to the right of the Blue Recovery Unit and connect to the Hydroponic Wheel inside the room. Rotate it to 315-degrees so Shane can walk beneath the arbor. Once on the walkway, connect again and rotate it to 158-degrees so he can crawl out the other end. Descend the ladder to the Yellow Recovery Unit.
Return the way you came and exit the room with the blue pipe to the building near the water reclaimer. Ascend the stairs near the large “1” on the wall. Before collecting the third device, ascend the stairs to the upper catwalk and loop around the walkway, disabling the two sprinklers with the crank.
Return to the locked door beneath the walkway and head downstairs through the darkened lab to the Red Recovery Unit. You can cut back through the building with the blue pipe to unlock a door leading back to the Water Treatment facility.
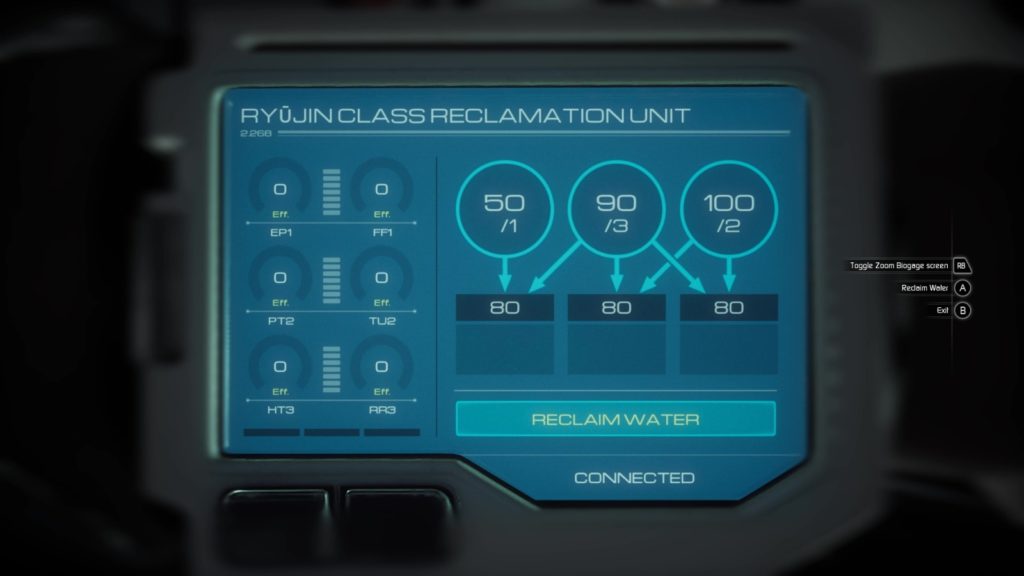
Insert the colored recovery units into their corresponding slots – don’t worry about the numbers just yet. Use the BioGage to connect to the Reclamation Unit and attempt to reclaim the water. This won’t work because the math is wrong. Each of the Recovery Units need to be dialed to a proper setting so that when split and combined, the numbers each equal 80 psi. Set them as follows: Red 50, Yellow 90, Blue 100. Exit the room and use the console near the blinking lights to power on the environmental controls.
ACHIEVEMENT: RED, YELLOW, BLUE – Fix the reclaimer.
Thing In the Mist
Objective: Escape the Greenhouse
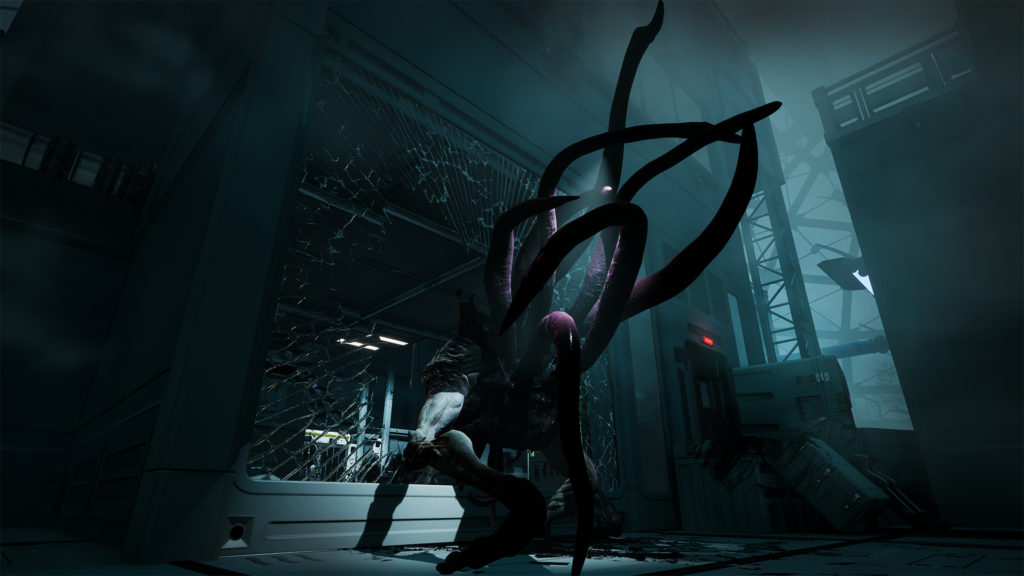
You have only one thing to do: RUN! The path is straightforward – the creature’s roots and limbs have blocked any branching paths (pun, intended). Loop through the building to the right and up the stairs to the locked door. The creature will jump down in front of you, just as the door gives way. Head outside, then leap down from the roof to the lower level.
Drop through the hole in the floor to the utility corridor below, activate the Flashlight, and climb into the crawlspace in the corner. Continue through the narrow passage until reaching the yellow hatch in the ceiling. Exit there, then immediately turn left and flee the creature descending the stairs in front of you. Move fast or die trying. The safety of the Airlock is ahead on the right.
ACHIEVEMENT: TUNNEL RAT – Escape the thing in the mist.
Objective: Go to the Communications Site
Don the helmet, replenish oxygen, and head out onto the Martian surface. The MYRCAT Rover is straight ahead. Climb aboard and start the engine to head to the communications site. With any luck, Shane will reestablish a satellite connection with Declan and the others. Exit the MYRCAT once parked and descend into the green-lit cave.
Cave of Madness
The orb on the pedestal reacts to the moons tattooed on Shane’s hand. Face the orb and hold the Focus Button until the energy pulses through the tendril on the floor and the blockage retreats.
Follow the purple-glow to the orb up ahead near the moons etching. Focus Shane’s energy on it as before to clear the corridor ahead. Be careful! A monster in the right-hand tunnel will try to sneak up on Shane when his back is turned. The creature retreats whenever Shane looks at it, so be sure to keep turning around to fend it off.
The third orb is located beyond the tendrils blocking the path. Look for it below the ledge Shane is on and focus once again. Jump down and follow the lights to the candlelit room with the empty pedestal.
Focus on each of the three orbs nearest the empty pedestal (watch out for the creature sneaking up on Shane). Now, with the pedestal fully powered, it’s time to locate the orb.
Read the research notes on the table to learn of the Immaculate Machine and the so-called Filth. Advance through the cave containing the serpent-like creature (aka Blackworm Jism) and run to the left once it retreats. Take the orb from the pedestal with the red rings and place it in the empty pedestal near the other orbs.
ACHIEVEMENT: CORRUPTION – Corrupt an orb.
Take the orb once it’s been infused with energy and return it to the pedestal with the red rings. This clears the Filth from the next section of cave. Descend to the lower level of the cave, the section that resembles a house. There are more orbs here to infuse with Shane’s energy.
The first is behind the partially opened door on the left. The second is near the desk with the green lamp on it, straight ahead. Take the orb from the upside-down table to the left of the second orb and place it in the pedestal in the large room to the right of the first orb. This clears the way for the cavern ahead.
Advance to the third empty pedestal, beside the locked door. Head up the path to the left, stare back the Blackworm Jism, and take the orb from the ledge. Place it in the empty pedestal then, after the fright, infuse it to clear the path to the right. Follow the purple glow to the next area.
There’s another empty pedestal on the right along with another one with red rings to the left. Take the orb from the table to the left and place it in the standard pedestal (save the one with the red rings for last).
There are a number of orbs in this area, each of them reachable, but not always clearly visible. Scan the ceiling, behind cracks in the walls, and within the entangled Filth to find them. With each successive orb you infuse, you’ll gain access to a larger area of the cave.
Place loose orbs you find in empty pedestals and follow the connections to the hidden orbs to power them. Charge the loose orb near the three doors, then return it to the pedestal with the red rings. This clears the Filth opposite the pedestal. Flee the pursuing “little dreams” deeper into the lower cave.
Shunned Basement
Light shines from behind the bookcase in the Shane’s childhood basement. It’s a secret passage, unlocked by tugging on the encyclopedia volumes in the correct order. The order corresponds to the atomic numbers of C, Be, He, and Be (“same as the second one”). There’s a periodic table in the laundry room, but anyone with a chemistry background knows the code is 6-4-2-4.
Nevertheless, you’ll need to look around the basement to collect the five photos that have been scattered about. Make a sweep of the basement and add each of the five photos to the inventory. There’s Photo #1 beneath the broken window to the left of the bookcase.
Cut through the dark room to the flooded area with the sparking wire. Here’s where you can unlock the game’s only unrequired Achievement. Unlock it by walking into the water and electrocuting yourself. Best to do this now, as the most recent Checkpoint was close by.
ACHIEVEMENT: ZAPPER – Maybe try going around the water.
Once you’ve earned the Achievement by dying in the water, bypass the water by walking along the pallets and shelves near the wall with the periodic table of elements. Enter the storage room and flip the circuit breaker for the laundry room to cut off the electricity. Collect Photo #2 from atop the grill in the storage room. Use the Crowbar to pry away the boards pinching Photo #3.
With the power to the laundry area turned off, you can obtain Photo #4 from the table in the back corner. Photo #5 is inside the hidden room behind the bookcase.
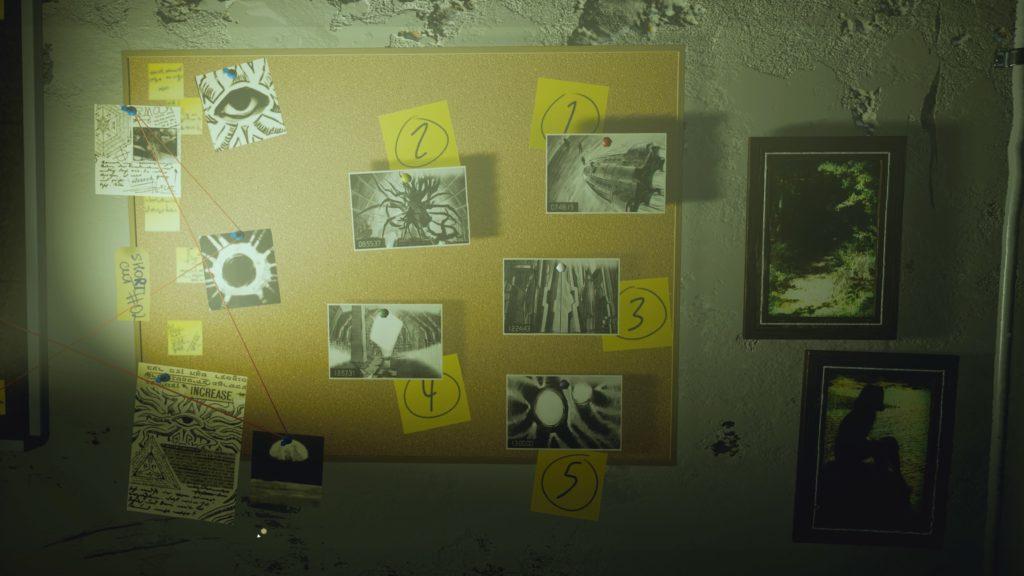
Bring all the photos to the bulletin board inside the hidden room and arrange them in ascending order by their timestamps: 07:48:15, 08:55:37, 12:24:43, 12:57:31, and 13:00:00.
This will illuminate the second stone tablet on the altar. One more to go!
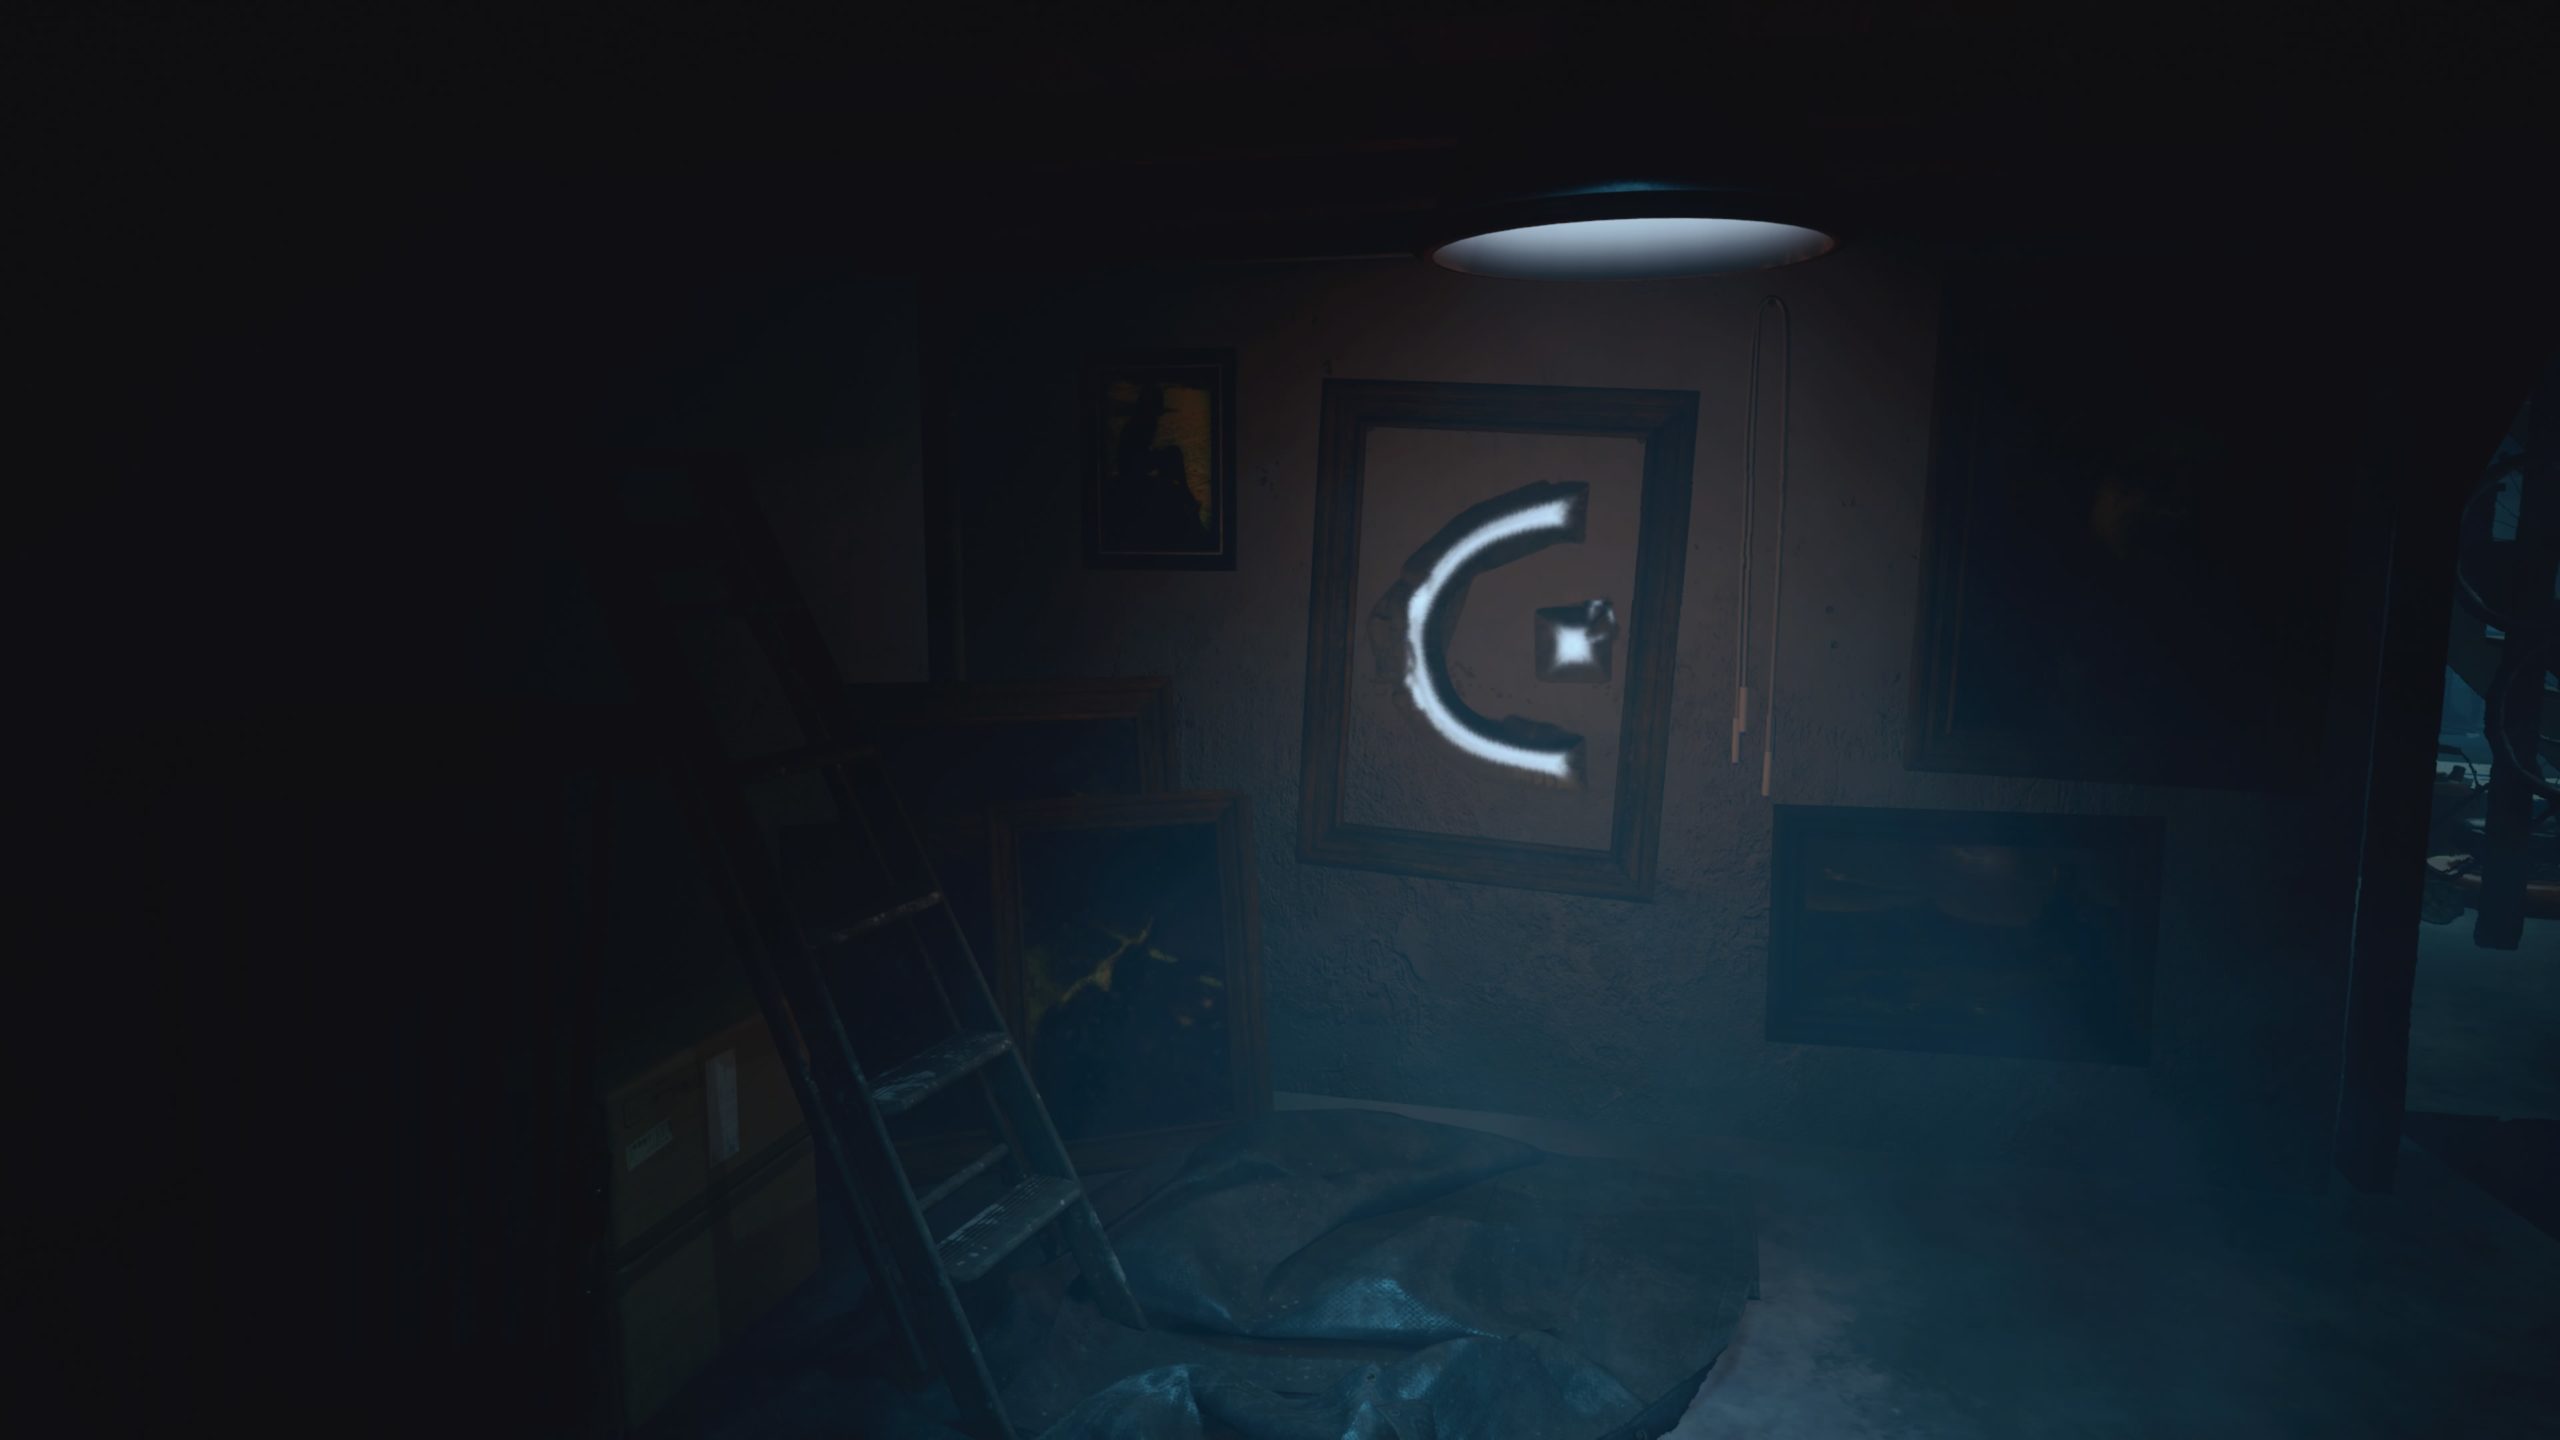
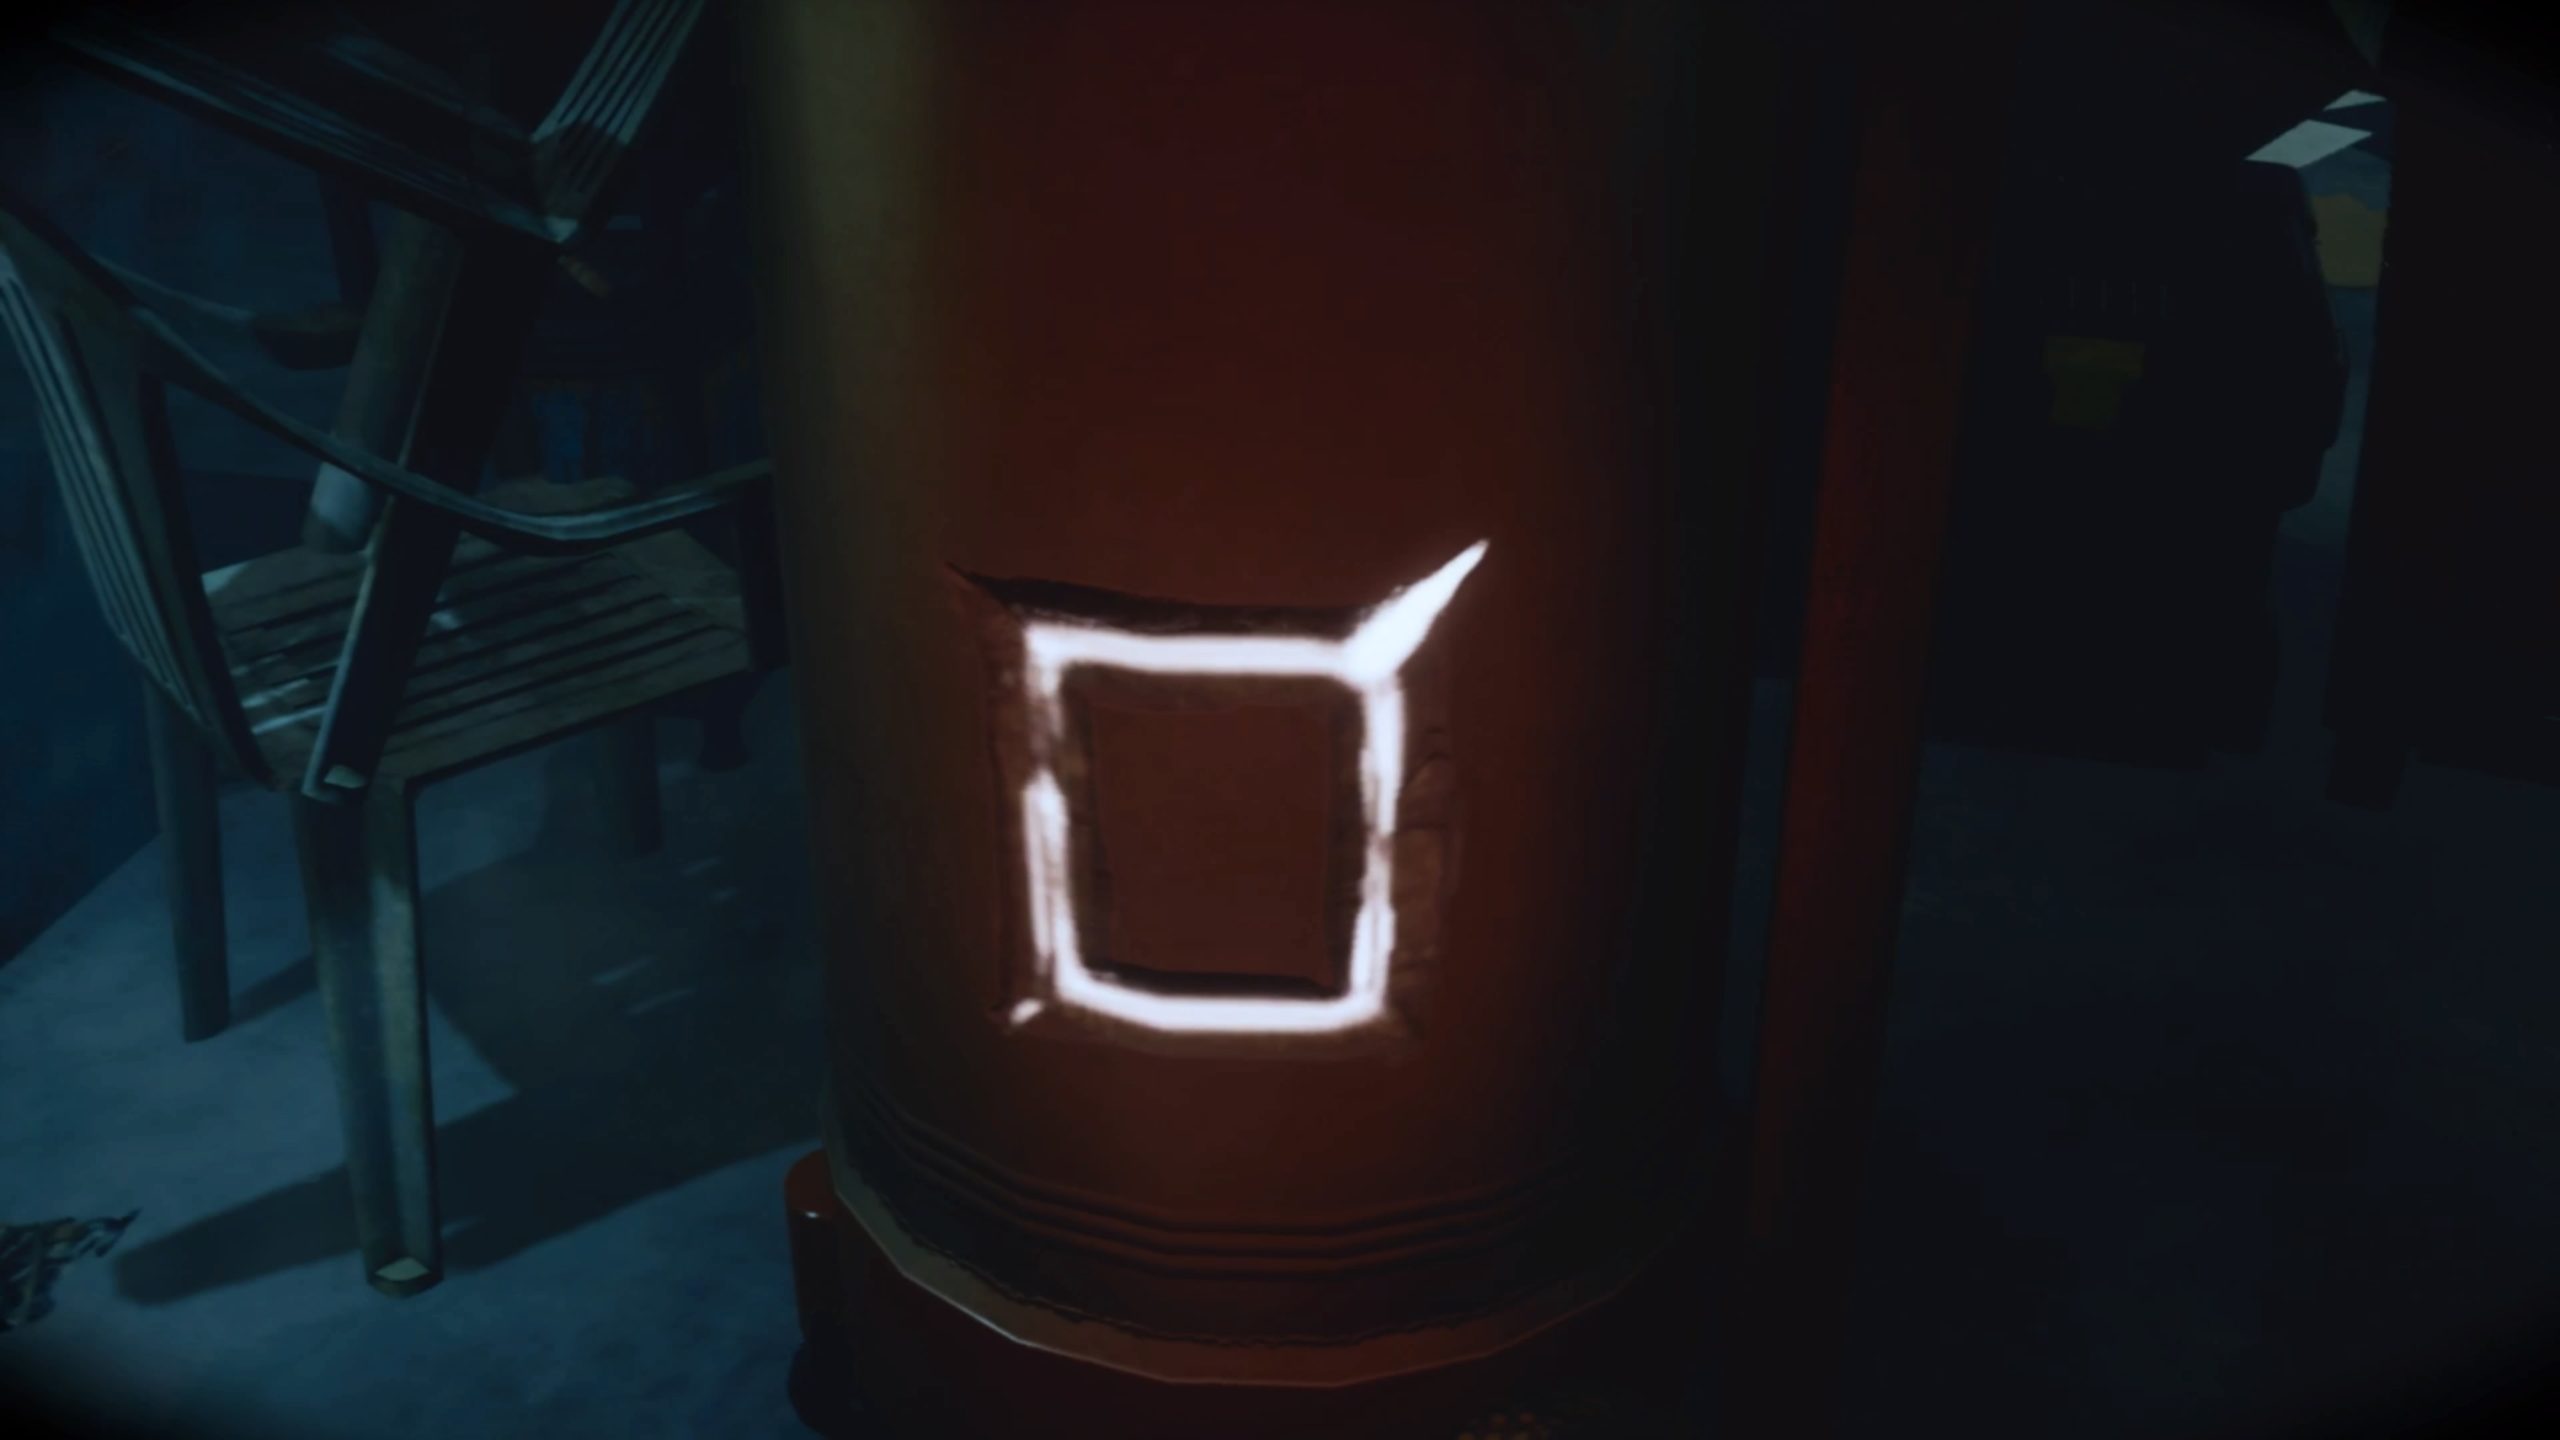
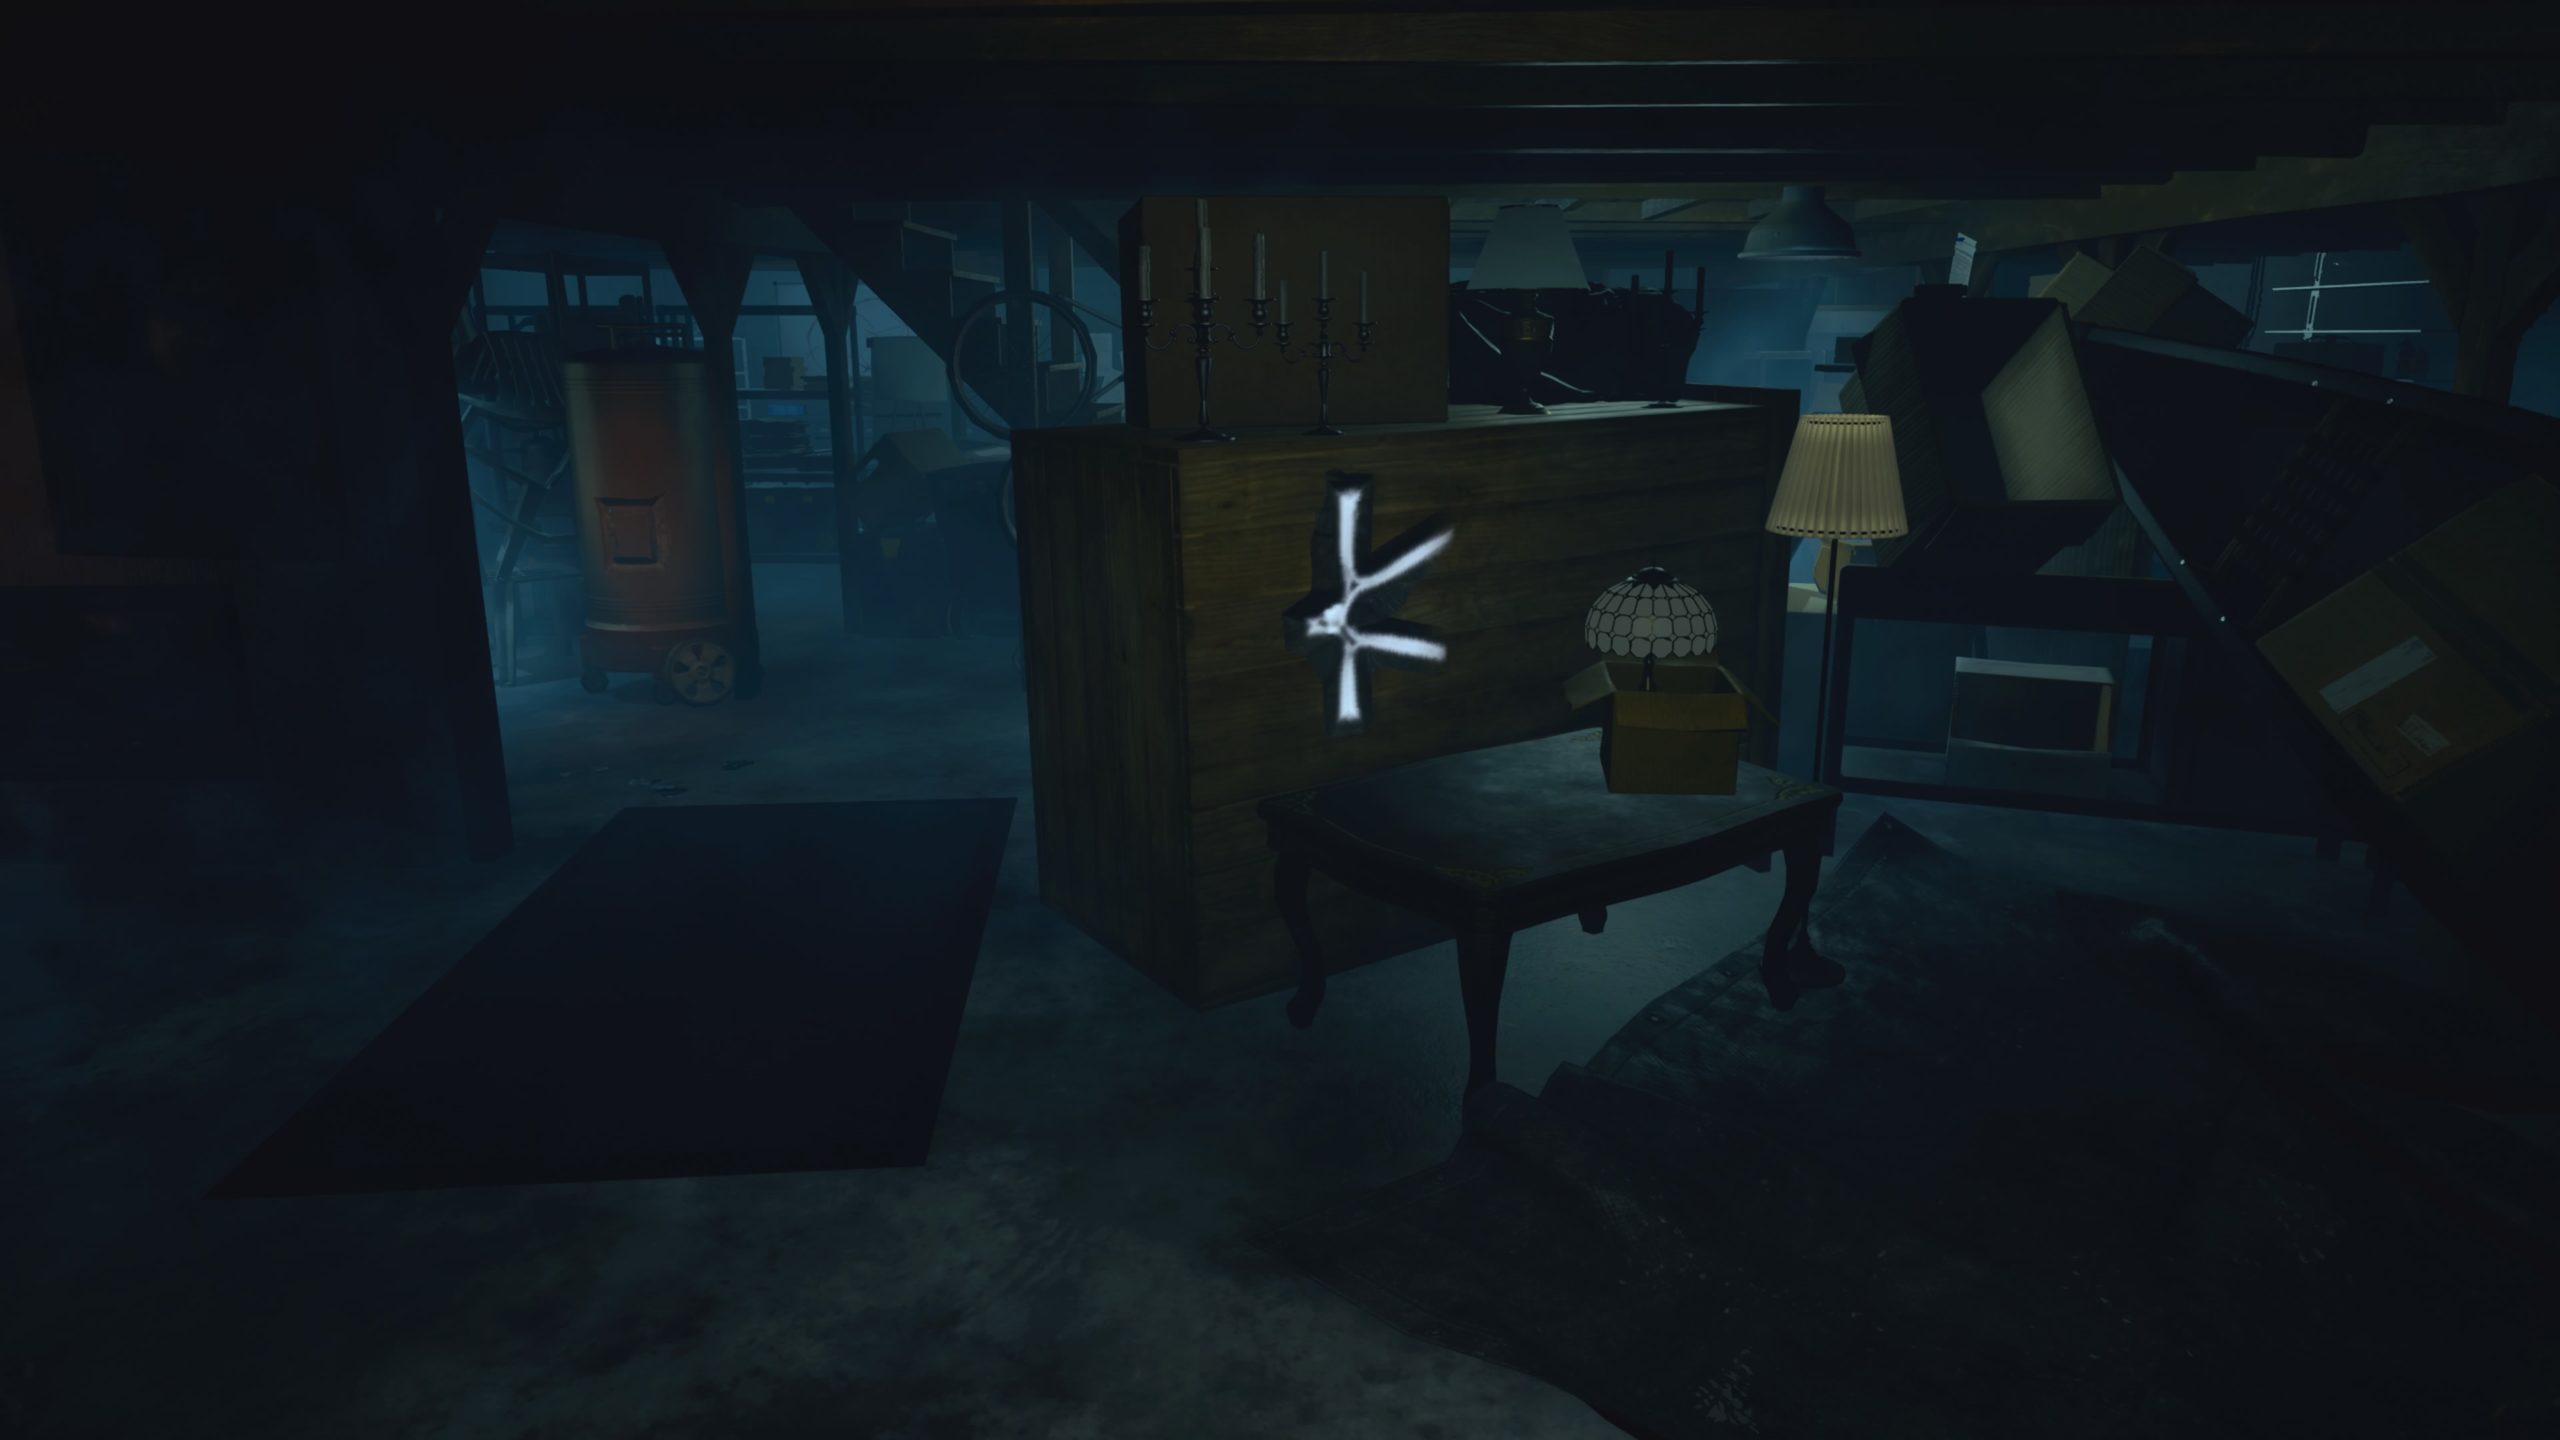
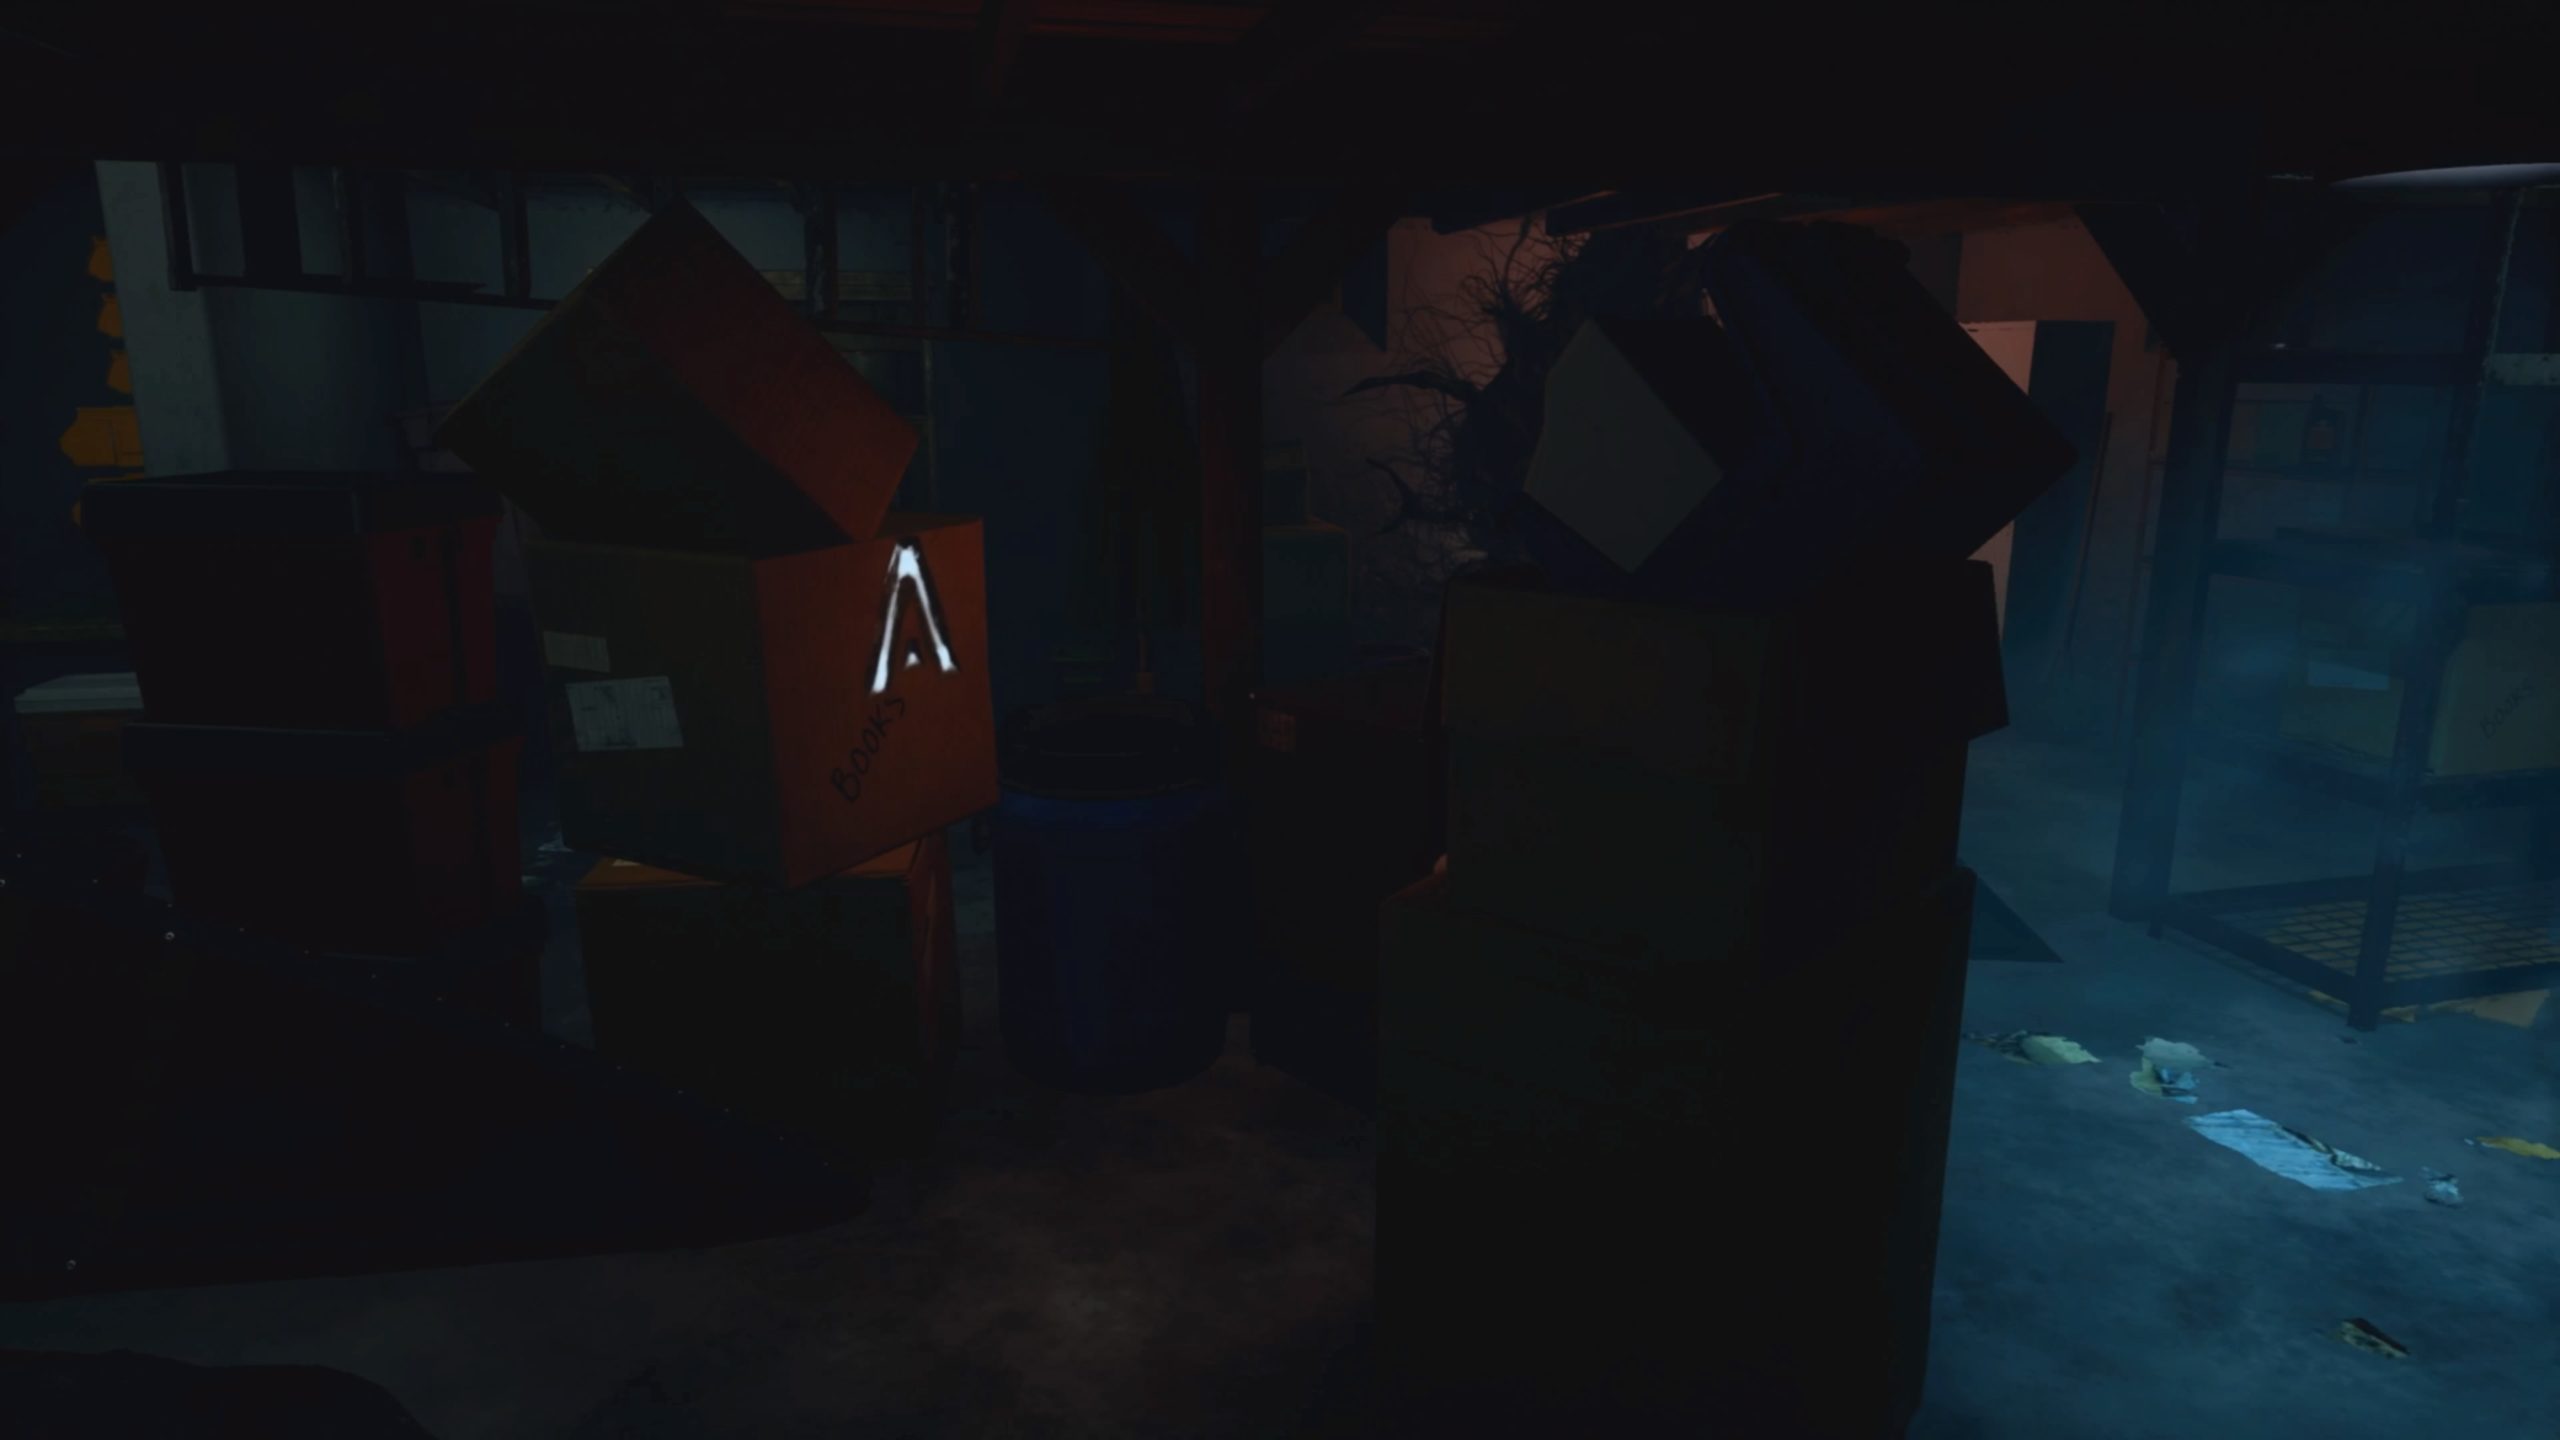
Now Shane must locate the four runes scattered around the basement. The “O” is on the hot water heater, the “C” is on the wall around the corner from it, the “A” is on the box of books in the center of the main room, and the “K” is on the back of the furniture near boxes. Focus on each letter until it turns red, then return to the hidden room and access the Necronomicon.
ACHIEVEMENT: KLAATUU, BARADA, OROCHI – Speak the three words.ACHIEVEMENT: ONE THIRD – Finish chapter one.
Chapter 2
Sabotaged Signal
Objective: Reach the Dish
Shane comes to in the MYRCAT Rover not far from the satellite communications dish. To access the dish atop the mountain, Shane must power up the M90 Badger (aka “Digger”) and hoist the load out of the path.
Access the storage crate nearest the Digger. The password for the keypad is written on the whiteboard in the other storage container: 7357.
Retrieve the Power Cell, insert it into the Digger, and use the BioGage’s “Test” feature to raise the obstacle out of the path. Climb the path to the malfunctioning elevator and loop around the hill in a clockwise manner. Replenish your oxygen in the storage container near the rock cairns, then climb the scaffolding and follow the lights up the mountain.
Enter the outpost atop the mountain and access the computer terminal (and journal in the sleeping quarters) to see how Declan has been fairing. Be sure to read the “Note for Shane”. Take the Power Cell as you exit the outpost. Use the Power Cell to activate the lift and ride it up to the satellite dish.
Objective: Contact Base
The communications station has lost power, but there’s a Power Cell on the table to the right. Place it in the socket near the door to restore power, albeit with a short in the system.
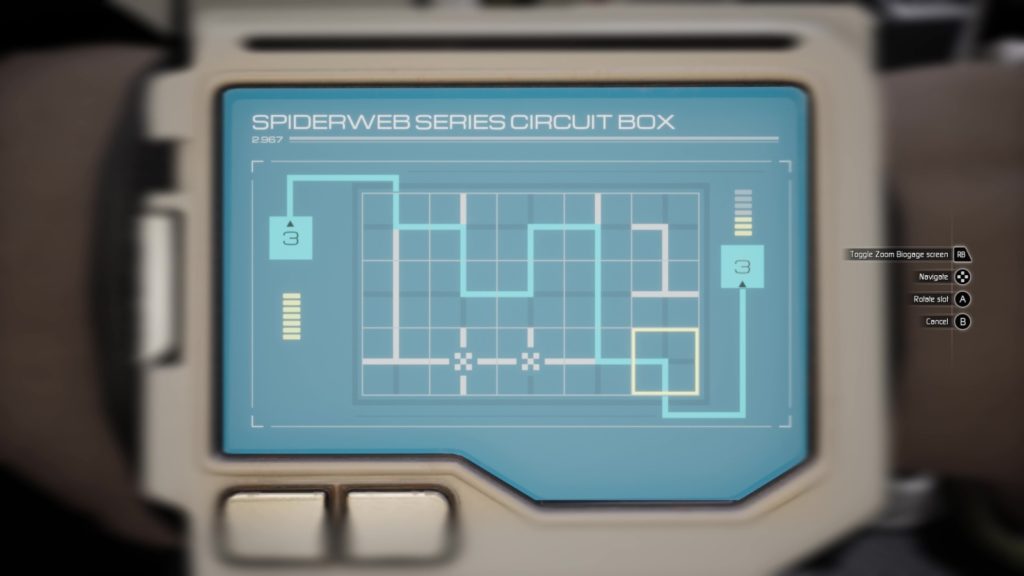
Connect to the Circuit Box nearest the power terminal and use the BioGage to rotate the circuit panels so the current (the blue “3”) completes the connection. Avoid the damaged nodes as shown in the screenshot, but note there are multiple solutions to each of these circuitry puzzles.
Move to the second circuit box. This box distributes power to the satellite dish and the PC terminal, but the damaged node makes it impossible to power both simultaneously. Complete the lower circuit first to restore power to the PC Terminal. Of note is the calibration manual’s specification of keeping signal quality above 85%.
Return to the second circuit box and reconfigure the circuits to divert the power to the upper connection, for the satellite dish. This activates the third circuit box.
The final circuit box is unlike the others in that it needs 9 amps of power to run the system. You must link the power through the power nodes to increase the energy from 3 to 9 as shown. Connect it to the +3, +1, and +2 en route to the end.
Scan your ID Card on the module in the center of the room to activate the satellite dish, then use your BioGage to calibrate the signal. Boost the signal over 85% and press the Radio Button to broadcast when prompted.
- Communications Module: Pitch 43 degrees, Yaw -158 degrees.
ACHIEVEMENT: BACK ONLINE – Fix the satellite.
Beings From Dust
Objective: Get Back to the Rover
Board the lift and hit the button. When it comes to a stop, jump to the containers below. Follow the lit catwalks down the mountain, crouching, jumping and falling as necessary. The lower lift is still missing its Power Cell, so you’ll have to jump once again.
Continue to the Digger, at which point the Filth will start to sneak up behind Shane. The Rover is missing, so you’ll have to cross the landscape on foot. Sprint from light to light as efficiently as you can to avoid the Filth which will begin to ensnare Shane in the swirling sand. There’s nothing to see behind him, so keep on running until the MYRCAT Rover is within sight. Climb aboard
ACHIEVEMENT: ESCAPE – Escape the sand storm.
The Looming Threat
Objective: Find Lukas
The infected mangrove roots have taken over the entire base, limiting where Shane can explore. Follow the signs on the floor to the Infirmary and use the PC to learn the formula Lukas had been working on to poison the tree.
The image on the monitor shows an Impure Formula (the weak poison) and the Pure Formula (strong poison). Shane must find all the ingredient vials and mix them at the centrifuge to create the poison.
Vials 1-4 are located in the test tube racks adjacent the centrifuge. Vial 5 is on the table to the left of the centrifuge. Vials 6-7 are on the table behind you, when facing the centrifuge. Don’t overlook the Poison Injector on the end of the table, as you’ll need that to deliver the poison to the tree.
The rules for synthesizing the poison are quite straightforward. There’s a seven-hex formula comprised of gray, blue, red, and purple hexes. This is what the colors represent:
- Gray: Empty
- Blue: One component
- Red: Two components
- Purple: Three components
The centrifuge must be kept balanced, but the placement of the individual vials doesn’t affect the formula. Select the vials based on their corresponding hex pattern. Select the vials from the right-hand side of the screen that will combine to produce the colored hex pattern as shown in the recipe on the left.
The first poison you make requires four vials to get the correct formula. Insert them two on each side of the centrifuge, with an empty slot separating them top and bottom.
ACHIEVEMENT: WATERED DOWN – Create a weak poison.
Exit the Infirmary and head left toward the Research Lab (stay away from the exploding flowers). Ascend the steps and inject the poison into the shiny white pustule on the plant.
Objective: Find a Way Into the Greenhouse
Following the conversation with Declan, head left to the PC. Collect Vial 8 from the test tube rack and access the PC’s log entries. Activate the BioGage Script on the PC. Now you can trigger the flower’s explosive bloom by scanning them with the BioGage.
Scan the flowers on the wall, then return to the Infirmary. Remove the vials from the centrifuge and repeat the steps to make a new, stronger counteragent. This second poison formula only requires three vials, so space them out in a triangular pattern. Each vial needs to have a component in the lowermost hexagon to produce a purple component.
ACHIEVEMENT: FIRE WATER – Create a strong poison.
Use the BioGage to clear away the flowers in the hallway and proceed to the Greenhouse entrance. Use the stronger poison on the growth obstructing the door to the airlock.
There’s no helmet at this airlock, so Shane’s gotta make a run for it on the Martian surface without protection. Open the door and follow the lights to the right as fast as you can. Shut the door and hit the pressurization button immediately upon entering the airlock by the Greenhouse.
ACHIEVEMENT: LUNG CAPACITY – Reach the greenhouse without running out of air.
The Poison Tree
Objective: Poison the Greenhouse Water Supply
Shane reached the room with the colored pipes from earlier. To poison the tree (which has all but taken over the facility) you must return to the utility corridors below ground and inject the poison into two water filters. Use the BioGage to repel the flowering plants and use the Poison Injector to clear away the roots connected to the large bulbous growths.
Ascend the stairs and enter building 2. Descend the steps inside on the left and proceed through the yellow hatch in the floor. Crawl past the steam on the left to the T-intersection. The filtration tanks are in the two rooms flanking this junction. Inject the poison into each, then return the way you came to the hatch.
Objective: Clear the Greenhouse
Exit the utility corridor and proceed through the lower level of Building 2 to exit via the door near the environmental control console. A root slithers away, granting Shane access to the tree. Approach the tree trunk near the pustules ahead, but keep your wits about you.
Boss Battle: Inna Volkova
Dr. Inna Volkova has become part of the tree and attacks whenever Shane gets close. This is a quick-time-style combat, but it isn’t terribly easy. In each encounter, Inna will grab hold of Shane and try to wrestle him into her grasp so she can bite him. Watch for a targeting reticle to appear, use the Look Controls to align it, then press the Interact Button when it flashes green before she attacks.
Keep focused on the yellow shrinking hexagonal marker and attack as soon as the green marker flashes. Make your way around the tree, using the Poison Injector to clear away the roots and the BioGage to trigger the floral blooms. You’ll have to fend off Dr. Volkova a total of three times, twice before the first Checkpoint.
The two attack opportunities come in quick succession during the third encounter, so be ready. Once you’ve fended her off three times – and driven the crowbar through her mouth – complete the lap around the tree using the Poison Injector and BioGage. Approach Inna where you first encountered her and put her out of her misery.
ACHIEVEMENT: TREE HUGGER – Farewell, Inna.
Objective: Investigate Inna’s Research Lab PC
Acquire Inna’s ID Card (Level 5 clearance) after killing her. With the tree killed, and the roots shriveled up, you can reach the Research Lab without going back outside.
Enter the Research Lab and approach the desk on the left of the server room, the one with the Russian stacking dolls. Use Inna’s computer to learn the access code for the Argus facility, then hit the Call Elevator button on the screen.
Access the secret elevator using code 5538.
Objective: Enter the Argus Complex
Scan Inna’s ID to access the elevator and select the Argus facility from the elevator controls.
The Argus facility is heavily secured by cameras that, upon detecting an intruder – that’s you – lock down all nearby doors. Use the BioGage to connect to the camera and point it away from where Shane needs to go. The camera will stay fixed in the new orientation for a few moments before reverting back to its initial position, so move fast.
Point the camera above the door on the right, then sneak through the door to the left. If detected, simply back away and let the camera reset.
Secret Keepers
Objective: Explore the Argus Complex
The next camera is unavoidable and unleashes a short-circuit defense robot. Rush the robot and defeat it using the tactics employed on Inna in the Greenhouse. Consider this encounter a tutorial of what’s to come: the robots are deadly.
Access the computers in the office then approach the locked door. Connect to the circuit box beyond the door and solve the circuitry puzzle. This one runs from right to left. Guide the circuits through the two “+1” nodes to deliver three amps to the far end.
Enter the next office and adjust the security camera so you can slip past undetected. Climb the toppled divider and leap through the broken window to continue.
The obstacles atop the conveyor belt up ahead blocks Shane’s path. To get the conveyor belt moving, you must connect to the security camera beyond the doors, aim the camera at the circuit box, and remote-connect from the camera to the circuit box. The only indication that this is possible is by the subtle button explanation in the control list to the right.
Complete the circuit by directing the incoming 7 amps through the -3 and pair of -1 nodes to the upper left corner.
Powering up the conveyor belt also activates the security camera in the hallway behind Shane, so be sure to reposition it. Climb over the conveyor belt and proceed along the far wall to the far end of the room. Be careful not to be spotted by the camera, as the robot will attack. Angle the camera away and use the computer nearest it to unlock the next door by disabling the security.
Inna’s Diary of Project Arbormor: The log entries on Inna’s computer inside the lab beyond the locked door chronicle the evolution she underwent. The entries are well worth the time it takes to read them. Don’t miss them.
Ascend the stairs to the command room and collect the CEO’s ID Card (Level X Clearance) from the desk. Access the PC with the CEO’s ID Card and read through the excavations logs to help Declan, then deactivate the security lockdown to continue through the door in the hall (ignore the camera).
Objective: Go to Icarus
The large room beyond the unlocked door downstairs contains numerous security cameras and patrolling robots. Shane must employ stealth tactics to cross the room undetected. This is arguably the trickiest sequence in the game, but not if you don’t try to connect to the cameras.
Instead of manipulating the cameras, stand out of sight, wait for a robot to turn around, then follow it past the camera while being sure to side-step the camera’s field of vision. To cross the room undetected, follow these steps.
- Head left and wait in the shadows for the first robot to turn around and begin his walk back to the right. Follow behind him, sidestepping the camera’s view, and cross the room. Duck into an alcove on the right before he turns around. Wait for him to pass.
- Hug the right-hand wall toward the containers near the stairs. Wait for the robot in this second aisle to cross back to the left, then loop around to the stairs. There’s nothing atop the stairs, but the walkway offers a view of the room so you can see the movements of the other robots.
- Watch from the steps to ensure there’s no robot near the chambers on the right. Descend the steps and loop around the robot chamber to the right, wait for a robot to approach between those two chambers, then follow behind. Make a dash along the wall to the green-lit door when he’s not looking. Beware the final camera!
Proceed to the Living Area, as marked on the floor, loop through the fitness center and continue through the broken window. Reach through the jammed door to open it after the surprise. Use the computer in the back office to unlock the door in the lobby. This puts you in the initial hallway you exited the elevator into earlier. Ride the elevator down to Icarus.
ACHIEVEMENT: SECRET REVEALED – Finish Secret Keepers.
Icarus Complex
Objective: Look For a Command Center
Stay clear of the Filth and access the PC in the first room on the left for story details – don’t miss the one on Lukas Van Buren.
Enter the large room with the two energy reactors in the center and crawl through the damaged door near the sparking wires. Continue through the lab space and offices as permitted to reach a large room with a narrow walkway around the perimeter (after the crawling robot torso).
Open the door and run across the Filth quickly as the Mysterious Voice speaks. Head left at the intersection by the elevator – it is activated by a hand scanner — and note the location of the door with the keypad. There are more computer terminals with log entries in the offices near the stasis tanks. Read through the entries to learn the code: 9510.
Use the code to enter the morgue and retrieve the Hand from the third drawer. Use it to call for the elevator and board as soon as it arrives. Proceed through the tunnels to the command center.
Eight Headed Monster
Objective: Explore the Mysterious Office
Take a look around the office, paying special attention to the rotating model of the facility and bronze plaque. Log into the computer using Eden as the password. Read the log entries to learn exactly how deep the trouble goes.
Objective: Find a Way Out
Sit down at the left-hand console and read the sticky notes for tips on opening the shutters. You must use the dials and buttons to adjust the settings to the following readings: Lighting 20%, Soundscape 100%, Numbing Agent 100%.
Adjust the red lever to set the lighting. Set the Sound slider to 4, the Wave Frequency to 3, and flip the toggles on the Numbing Agent panel to match the pattern on the yellow note to the left of the screen. Once the Sensory Deprivation settings are adjusted correctly, move Shane’s hand to the Window Shutter controls. Press the third button, then the first button to open the shutters.
ACHIEVEMENT: THE DREAMER – Reveal the Dreamer.
With the Dreamer revealed, move to the right-hand console to enter the activation code. The code, as written on the sticky note near the PC, is 512. Turn the red dials to adjust the settings. Press the large red button.
Knowledge Consumed
Shane enters a dream sequence involving his childhood therapist’s office. Investigate any items that can be interacted with in each of the areas during this sequence. There are no puzzles to solve and little threat to Shane’s existence. The doors leading out of each area will open once you’ve interacted with the necessary items.
ACHIEVEMENT: TWO THIRDS – Finish chapter two.
Objective: Go to the Cyrano Crash Site
Ride the elevator back to the Research Lab, exit to the hallway and go straight through the darkened door to the Airlock. Board the MYRCAT outside and ride it to the Cyrano Crash Site.
Chapter 3
The Gate
Objective: Find a Way to Open the Gate
Scan the pieces of the alien orb on the pedestal and connect to the Gravity Manipulator. Zoom the BioGage screen so you can better see all of the pieces. Change the layers one by one and rotate them to complete the puzzle. The pieces need to fit together but, as important, the lines need to match up. If you focus on aligning the pieces so that the lines form a large circle on the right half of the screen, they should fit. See the image below for the solution.
ACHIEVEMENT: OPEN SESAME – Open the gate.
Bitter Reunion
Objective: Reach Commander Wilcox
Follow the path through the Martian ruins beyond the gate. Follow the seemingly dead tentacles up and over the ledge to the oxygen refill station. Continue to the well-lit room with the sealed gate. Slip through the opening in the wall on the right, atop the stairs, to continue. The path steepens, becomes more of a cave. Keep going.
Top off your oxygen supplies even if near full and descend to the sand below.
The creature you saw from above snakes its way through the sand. Shane must be atop solid rock or a man-made material before the creature reaches him, else he’ll be killed. Run from outcrop to outcrop, waiting for the creature to “swim” away. There are multiple sand creatures so be patient. Move from light to light when the path is clear.
Continue to the Gaia Engine. Once at the overlook, descend the rocky path on the left to reach Commander Wilcox.
The Immaculate Machine
Objective: Activate the Gaia Engine
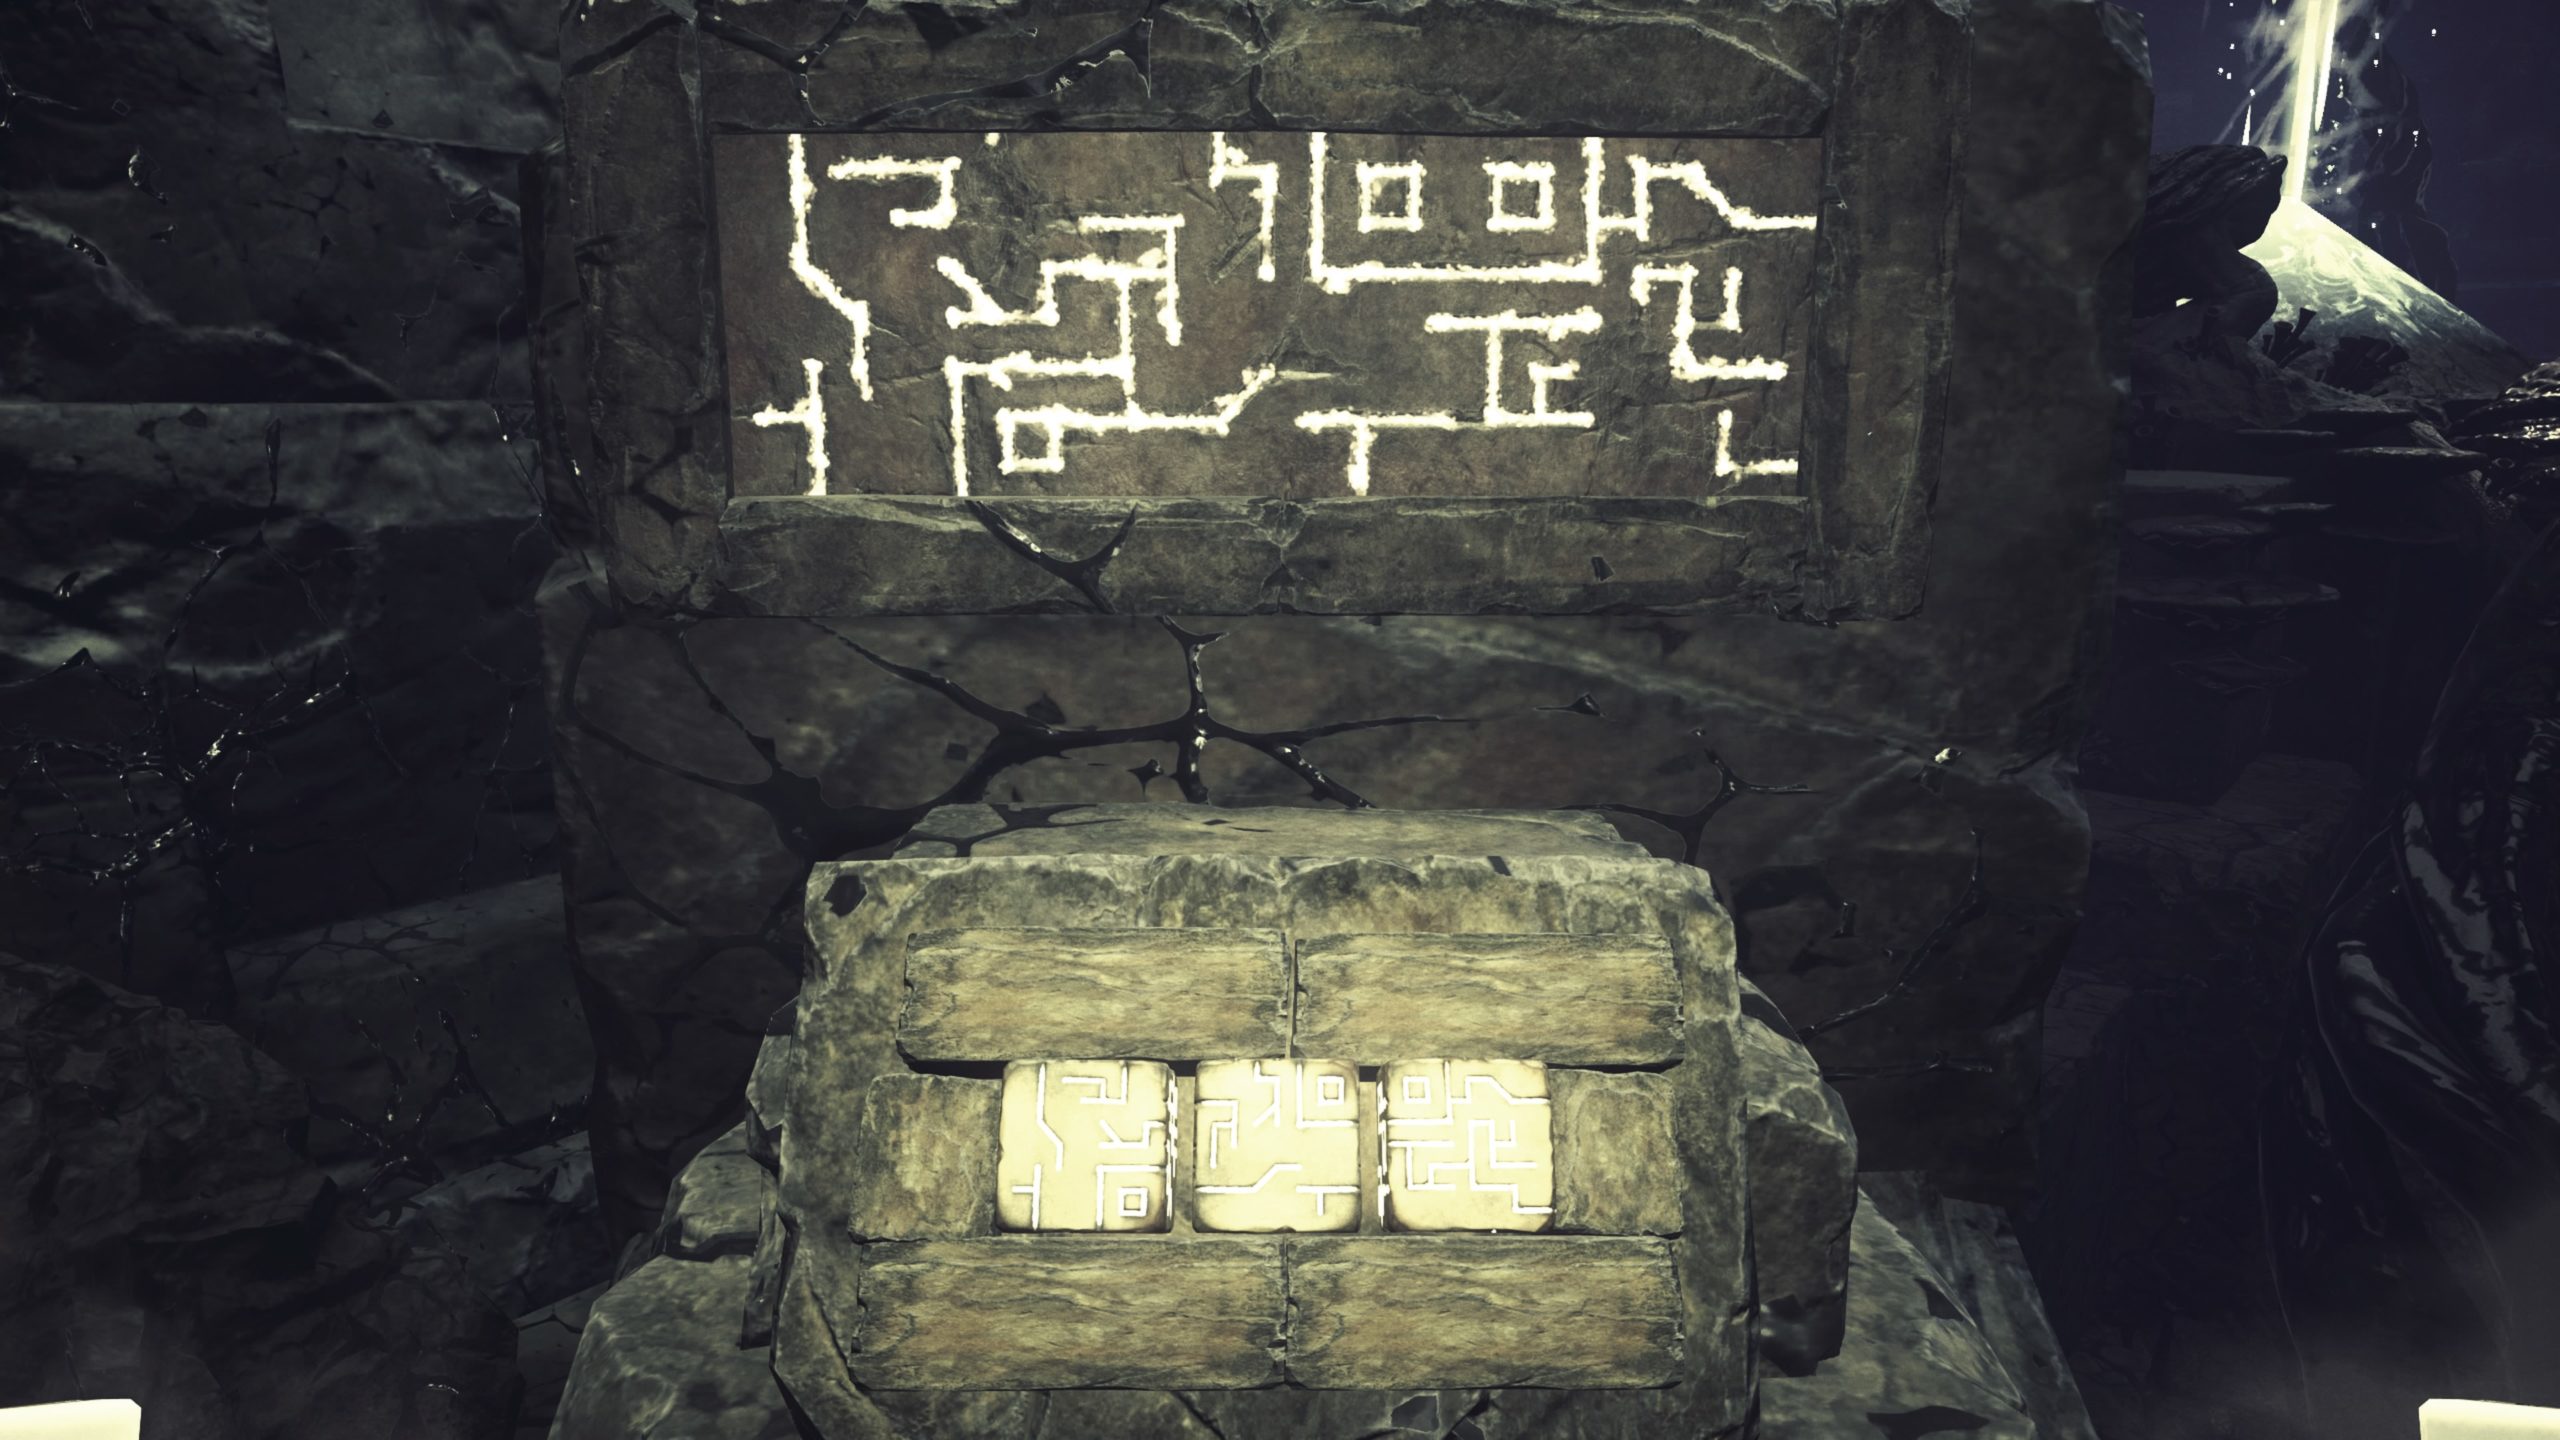
The three pillars surrounding the Gaia Engine each have a puzzle needing to be solved. Beginning with the pillar to the right of Declan. Pick up the cube from the floor and insert it into the middle of the sigil panel on the pillar. The key for solving these puzzles is to rotate the cubes so that the inlays on them match the etchings in the stone pillar. This gets harder as more of the panel is rubbed off, but there’s always enough to use as a guide. The cubes are locked into place once correctly aligned, so if you can’t pick one up, trust that it’s already correct.
- Pillar 1: The left and right cubes are already correct. You need only rotate the one from the ground. Align it as shown and insert it into the slot.
- Pillar 2: Pick up the two pieces from the ground and add them. The left-hand cube is already correctly aligned. This one is quite straightforward. Align the cubes so that the small squares are in the lower right and lower left corners for the middle and right-hand slots, respectively.
- Pillar 3: As with the second pillar, there are two cubes on the floor and one already correctly aligned. Using the squares as a guide again, align them so the middle cube has the square on the lower left corner and the right-most cube has a square on the upper left. There is more than one square on each cube, but their presence helps you narrow down the sides of the cube.
ACHIEVEMENT: TWIN MOONS – Start the machine.
As the World Crumbles
Objective: Escape
Escape the crumbling ruins by running through the path as allowed. Climb over the rubble and duck beneath the fallen columns to reach the cavern in the distance. Climb along the narrow rocky path along the left, but be careful not to go too fast as Shane can get bounced to his death from any tremors. One particularly violent jolt causes the rock he’s on to slide down the hill. Take your time and ride it out before continuing.
Board the MYRCAT Rover and start the engine. Shane must reach the launch site. It’s time to board the Invictus.
Last Man on Mars
Objective: Escape Mars
Head inside the facility near the parked Rover, ascend the stairs and climb the ladder to the command tower. Press the large red button to restore power to the Invictus. Descend the ladder and snake your way past the tendrils to the exit.
Burrowing sand creatures now prowl the area surrounding the launch site. Shane must carefully run between the rocks and fallen panels to reach the Invictus safely. Tendrils block the path to the right, forcing Shane to loop wide around the Rover. Climb onto the structure to the left and tightrope along the cargo trailer, then dash for the open storage container in the distance. From there, run from rock to rock until you reach the ramp leading up to the Invictus elevator.
Once inside the ship, climb the ladders to the cockpit and strap in. As Shane says, “everything needs to be green.”
Flip all the switches, hit all the buttons, and adjust the sliders until all the lights on the dashboard are green. Only then can you press the big red button to launch the Invictus (but first note the sticky note on the control panel – Declan had a plan, after all).
ACHIEVEMENT: BLAST OFF – Launch the ship.
Moons of Madness
The final three Achievements are all earned during this short climactic sequence. One is unavoidable and will unlock during the credits. The other two are linked to a choice given during the ending cinematic. Ignore the on-screen prompt for one ending, follow it for another. Note, that you can quit to the Main Menu and select “Continue” during the credits to quickly experience the other ending and unlock the final Achievement.
ACHIEVEMENT: PROBLEM CHILD – Refuse your mother. Follow the on-screen prompt.
ACHIEVEMENT: MOMMY’S BOY – Help your mother. Ignore the on-screen prompt.


